
Resource Utilization Best Practice Considerations for OpenAir
Resource Utilization is a key metric to understand productivity of employed staff and earnings. Typically, utilization implies billable hours and therefore the higher the billable hours the more revenue the company will earn. However, there are many types of utilization categories, all of which serve a purpose to provide a holistic view of where employees spend their time during the workweek.
Billable hours drive revenue typically, whereas non-billable hours do not. Non-billable hours include benefit time such as sick time, PTO, company holidays, etc. and other items unplanned such as bench time and administrative efforts. It should be the goal of your organization to reduce unplanned non-billable hours in order to allow employees to focus more on billable hours or other productive contribution areas. There is usually a grey area between Billable and Non-Billable hours called Comp Eligible or Productive or Credited Non-Billable hours. This grey area tends to be investments in activities that will drive sales or revenue in the future such as demos, proposals, sales calls, etc. If utilization drives compensation or bonus amounts per employee, credited non-billable hours tend to be tracked and used as a factor in determining final qualification and computation of bonus amounts.
OpenAir provides the ability to define utilization targets for individuals which, when combined with measures to dates, can manifest into self-service reports. These ensure individuals are clear as to their progress on compensation earnings and meant to motivate individuals to achievement.
Task Types
Task types can be set up and indicated per task to define the type of utilization. Once the task is identified within the project, any time posted will be aligned to the specified task type. This is not a value visible on timesheets, rather an infrastructure setup that supports data reporting and analysis based on task type definitions.
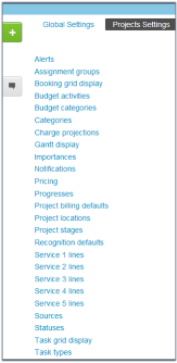
To set up task types, navigate to Administration>Application settings>Project settings>Task types
Create tasks types based on the reporting metrics needed. Typical task types include billable, non-billable, credited non-billable, training, and time off.
Access internal projects and set task types on all tasks with the desired value. If you have template projects setup from which to create new projects, set the task type per task accordingly. If your project setup includes creation of new tasks individually, it is recommended to set the default value of task type to Billable, as many new tasks on client projects fall into the billable category.
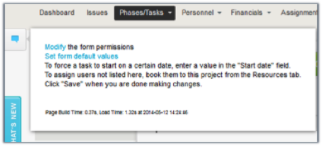
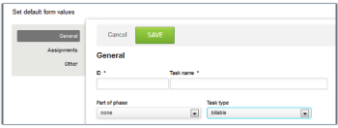
To set a task form default, create a new task within a project (any project as you will not be saving the task) then access the quote bubble icon on the far left of the screen to access the ‘Set form default values’ form.
Set the task type to default to billable and save. Any new tasks will have this value defaulted.
Custom calculations may be used in reporting to identify specific types of utilization or consolidate different types of utilization by task type. An example of this is a productive utilization calculation. Some organizations view this as a combination of client billable time (billable task type) and credited utilization time. Custom calculations can provide visibility into task type utilization categories for analysis of information by different cross sections.
To create a custom calculation navigate to Administration>Global settings>Custom calculations
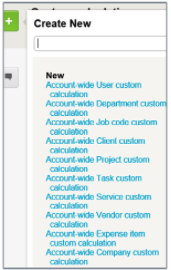
1. From the Global Create icon, select Account-wide Company custom calculation, as this will ensure that the calculation is available across reports.
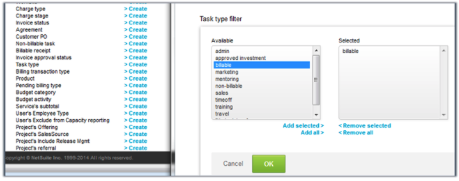
2. Select the right and left hand operand, name the calculation and save. If you are creating a calculation for specific type of hour, you will filter the task type to identify the type of hour.
3. The Constant-One (1) right operand, in the sample below, is a custom detail field of type Time Entry Detail Field with a constant of 1.
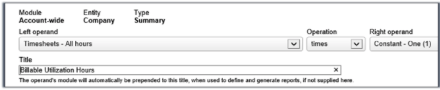
4. In the example below, the billable utilization hours are defined by using a filter on task type to only select ‘billable’.
5. Once the calculations are created a report can be created to illustrate the data elements.

Calculating utilization averages means you include all users that have time in the system at some point during the timeframe of the report. The challenge with this is when a user starts with the company in the middle of the reporting timeframe or leaves the company in the middle of the reporting timeframes. When the user is not part of the company, their utilization falls to zero, which will impact the overall average of a department, region, or company report. User entity tags allow dates to be associated to custom values so users only contribute to averages and totals during the timeframe the tag is applicable. An Employment Status tag group with tag values of Employed/Not Employed support this reporting feature.
• To enable user entity tags, navigate to Administration>Global Settings>Optional Features and ‘Enable the User Tag Feature’. A new link will appear as part of the user account definition called ‘User Entity Tag’.
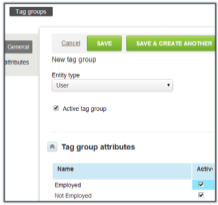
• To create a user entity tag, you will need to set up a tag group. Navigate to Administration>Global Settings>Tag Groups.
• Create a tag group

• Define the tag group name, attributes for the tag group and click on the active check box.
• Now set the correct value on all users included in the utilization report by accessing each user and the User Entity Tag link within the user account.
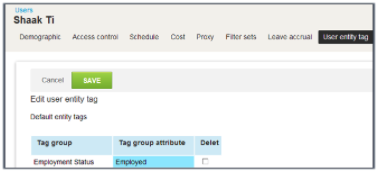
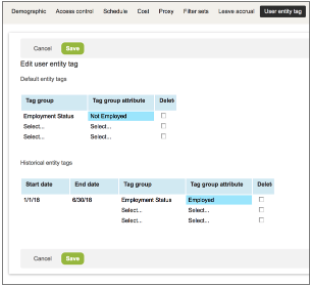
The top portion of the User Entity Tag form is the current or default value and the bottom part of the form controls the start/end dates of historical values.
6. When a user is new to the company, set the Employment Status default to ‘Employed’ and the historical value to 1/1/00 to
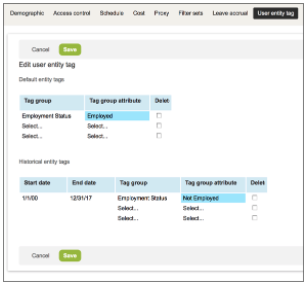
7. When a user leaves the company, set the Employment Status default to ‘Not Employed’ and the historical value of
A Word of Caution
The activation and inactivation of user accounts will not automatically update the User Entity Tag value. keep reporting accurate, ensure audit controls are in place for entity tag accuracy.
Target Utilization
Many companies define targets for individuals as part of a compensation or bonus plan. To provide self-service reports and dashboard on attainment of defined targets, users can have their target utilization defined as part of the user record. Target utilization creates new reporting values called Target Hours and Base Target Hours that multiplies the entered target utilization percentage against the Work Schedule hours defined per the user’s Schedule settings.
Target utilization is a feature that needs to be enabled on the user record prior to data entry. To activate target utilization on the user record, navigate to Administration>Global Settings>Optional Features and ‘Enable Target Utilization Feature’.
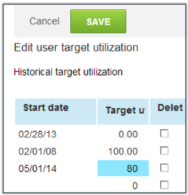
Now set the target utilization percent and date of when it is effective on all users included in the utilization report by accessing each user and the Target Utilization link within the user account.

To specify utilization, add the percentage as a whole number with a corresponding start date. Utilization may change with changes in role or changes within the organization. Simply add new utilization targets with a new start date when the change occurs. The previous utilization target will be used for reporting from the previous start date to the day before the new entry start date.
Reporting Values
When reporting on values related to utilization it is important to understand the differences between fields that look quite similar, and to be clear on your company’s policy on how to calculate utilization percentage – particularly what you wish to use as the divisor in the calculation.
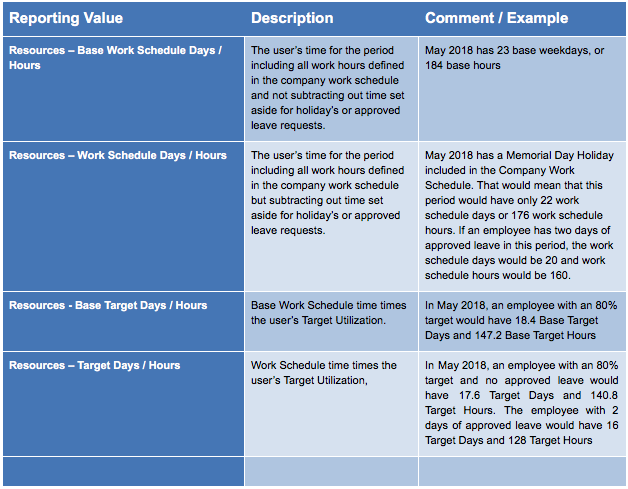
The built-in field “Resources – Percent historical utilization uses Work Schedule as its divisor – which may not be your desired calculation. In fact, all of the built-in utilization calculations use the user’s Work Schedule as their divisor. Therefore, you may need to create custom calculations that represent your company’s policies.
When configuring your custom calculations to calculate utilization for your company, be mindful of which field you choose as the divisor (denominator) in the calculation.
• If your targets are set based on the full year’s calendar with no consideration for holidays or time off (most common), be sure to choose the Base Work Schedule Hours as your divisor.
• If your targets are set based on a calendar net of time off, then use the Work Schedule Hours.
• If your targets are based on the full calendar net of only holidays, you would need to create a custom calculation that takes Work Schedule Hours and adds back Approved Leave Request Hours and use this custom calculation as your divisor.